Author

momfad_com

This post is sponsored by Burt’s Bees, but the content and opinions are my own.

I’m a bit obsessed with lip care — dry, chapped lips drive me crazy. I keep lip products everywhere (desk, car, bathroom, purse, next to the bed) so I’m never caught without something on hand. Soft, kissable lips are something we all want, right?

4 Simple Tips for Super-Soft, Kissable Lips

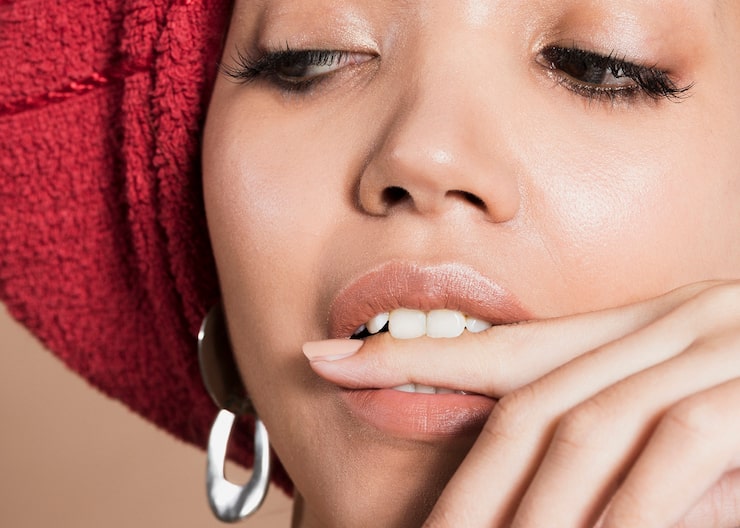
I’m sharing a few of my favorite tips for super-soft lips and one must-have this winter: Burt’s Bees Lip Butters.

Burt’s Bees Lip Butters have been a lifesaver for me. They’re 100% natural and made with responsibly sourced shea butter to keep lips hydrated with a soft sheen. They work well for all-day moisture, and you can layer them under or over lipstick. I love the botanical flavors:
– Limited-Edition Vanilla Clove: comforting vanilla with a warm clove twist.
– Lavender & Honey: my go-to bedtime scent — calming and soothing.
– Orange & Pistachio: bright and cheery — reminds me of summer; my most-used flavor.
– Rosemary & Lemon: energizing, great for a midday aromatherapy pick-me-up.

With natural ingredients, responsible sourcing, and an easy-to-open, recyclable tin, this eco-conscious mom is a fan. You can find them at your local Ulta or online at ulta.com.

My top tips for ultra-smooth, soft lips:

1. Lip Scrub
Once or twice a week I do a lip scrub to remove dry skin and reveal smooth lips. You can buy one or make your own. A few simple DIY mixes:
– Sugar + honey
– Sugar + coconut oil
– Honey + brown sugar + coconut oil
Mix sugar with the other ingredient about 1:1, gently rub onto lips (or use an old toothbrush), rinse, and finish with Burt’s Bees Lip Butter for lightweight, creamy moisture.

2. Keep Moisturized
Moisturize, moisturize, moisturize. Winter weather, wind, and indoor heat dry out lips fast. Apply balm before going outside, at bedtime, and even under lipstick. Burt’s Bees Lip Butters feel lightweight and never greasy or sticky, so they’re great under or over lipstick.

3. Drink Water
Hydration matters for your whole body — including your lips. Most of us don’t drink enough water (coffee doesn’t count). Drinking more water helps your skin glow and keeps lips plump.

4. Lip Masks
Don’t forget lip masks. They give a big moisture boost and are perfect when your lips need extra care.

Do you often battle dry lips? Which Burt’s Bees Lip Butter would you like to try?

This wellness content is sponsored by Sensoril® Ashwagandha through Maverick Mindshare.

Motherhood is a beautiful journey full of love, laughter, and special moments — but it can also be exhausting and stressful. Many of us put our family’s needs first and forget to care for ourselves, which can lead to burnout. The good news is there are simple, effective ways to manage stress and find more balance. Here are seven practical strategies that have helped me handle the stresses of modern motherhood:

Finding Balance in Motherhood: 7 Stress-Management Tips Everyone Should Know

1. Prioritize Self-Care
We often put everyone else first, but you can’t pour from an empty cup. Make self-care a must, not an afterthought. Whether it’s a long bath, reading, or a few minutes of quiet, pick things that help you relax and recharge. When you care for yourself, you can better care for others.

2. Ashwagandha: A Natural Stress Support
Ashwagandha is an adaptogenic herb used for centuries in Ayurveda to help the body handle stress. Sensoril® Ashwagandha is a trusted form used in supplements; it includes both leaves and roots, which research suggests may boost effectiveness. I take a Sensoril-based supplement daily and have noticed I handle stress better and sleep more soundly, especially on rough, late-night parenting days. It’s a gentle, natural way to support calm and resilience. If you want to learn more, check the brand’s website. And remember to talk with your healthcare provider before starting any new supplement, especially if you’re pregnant or nursing.

3. Build a Support System
Lean on friends and family who get what parenting is like. Sharing your feelings and getting a fresh perspective can relieve stress. Find a community — online or in person — or connect through activities you love. Some of my closest friends are from yoga class, and having people to vent to makes a big difference.

4. Practice Mindfulness and Meditation
Short daily mindfulness or meditation sessions can help you stay grounded. Find a quiet spot and focus on your breath for a few minutes each day. If you’re new to it, plenty of free apps can guide you. Breathwork also helps: try the 4-7-8 method (inhale 4 seconds, hold 7, exhale 8) or deep abdominal breathing where you fill your belly and chest like a wave. These techniques calm the body and are great to use before bedtime.

5. Get Moving
Exercise is a powerful mood booster. A walk, yoga class, or dancing around the living room with your kids releases endorphins and lowers stress. Aim for about 30 minutes of activity a day when you can.

6. Organize Your Time
Managing a household and kids can feel chaotic. A simple schedule can help. Plan daily or weekly routines that include work, chores, family time, and — importantly — time for yourself. Our family uses a shared online calendar, which keeps things clearer for everyone. Delegate chores when possible; it lightens your load and teaches kids responsibility.

7. Seek Professional Help
If stress feels overwhelming or won’t go away, don’t be afraid to get professional help. Therapy or counseling can give you tools to manage stress and improve your mental health.

Motherhood brings so much joy, but it can also be stressful. It’s okay to put your well-being first. By using these strategies, you’ll be better equipped to handle challenges and find more balance. You’ve got this!

Hey there, home décor fans! Tired of guessing where to hang your favorite artwork? We’ve all been there—trying to hit that “perfect” spot. Let’s walk through simple tips to get a balanced display that really changes a room.

We’re at the fun part of our home project: decorating! We just finished a wallpaper mural in our son’s room from Photowall and loved how it turned out. When we ordered artwork, we chose Photowall again. They offer tons of prints, canvases, posters, and murals with easy customization, so it was simple to find pieces that fit our space.

Find the Perfect Height to Hang Your Pictures

Now for hanging. Here are my favorite tips for getting the best look.

The “eye-level” idea: Not everyone’s the same height
People often say to hang art at eye level, but everyone’s eye level is different. Pick a height that works for your household—a comfortable middle ground, not just a rule.

The Goldilocks rule: not too high, not too low
Think Goldilocks: you want the “just right” height. Not so high you need a ladder, and not so low your dog could admire it better than you. A good rule of thumb is to place the center of the artwork about 57–60 inches from the floor. That usually looks right for most rooms.

Grouping artworks
When you’re hanging several frames, treat the group like one big piece of art. Find the group’s center and measure from there. Mix frame sizes and styles for interest, but keep them inside a shared boundary so everything feels cohesive.

Tools and patience
Before you hammer, grab a tape measure, pencil, and level. Measure twice, mark once, and step back to check the look before making holes.

When to break the rules
Rules are helpful, but breaking them can be great, too. Try dramatic placement—like a statement piece over a doorway or an arrangement that runs floor to ceiling. Intentional rule-breaking can create a striking effect.

Wrap-up
With the Goldilocks approach, a little creativity, and a tape measure, you can hang your art with confidence and make your walls tell your story. Go on—hang those pieces and enjoy the finished look!

If you’re shopping for new pieces, Photowall gave me a coupon for 20% off plus free shipping at photowall.com. Use code: mgh20.

The holidays are here, and I’ve rounded up some of my favorite women’s gift ideas from adidas. Whether you’re buying for a yoga fan, runner, gym-goer, or someone who loves athleisure, these picks should cover it. Here are a few adidas items I think will be popular this season.

Superstar Shoes
I love adidas running shoes, but I also have a soft spot for the Superstar. With loads of color options, they’re the perfect casual-sport sneaker for streetwear and everyday wear. I like pairing them with jeans or a casual dress for a day out, or wearing them to yoga. The leather upper and rubber outsole make them more durable in cool, wet weather compared with suede styles. Available at adidas.

5 Gifts from adidas for Every Woman Who Loves Fitness

Tracksuits
A classic tracksuit is always a safe choice. With different cuts—from wide leg to skinny to the traditional fit—there’s a tracksuit for everyone. The new glam pants are my favorite, and that purple shade is beautiful. Great for staying cozy in cooler weather. Available at adidas.

Hoodies
I’ve added so many hoodies to my wish list that it’s hard to pick a top favorite. A soft, cozy hoodie is a gift that rarely misses. One go-to is the Essentials 3-Stripes Zip-Up hoodie—lots of colors, a flattering cut, and a staple piece. Another favorite is the Essentials Big Logo Regular Fleece Hoodie: ultra-soft, warm, and just the right weight. Both look great with leggings or skinny jeans for a casual, put-together vibe. Available at adidas.

Long Line Bra Tank Top
This longline bra tank is a true favorite. With medium support, a seamless fit, and a built-in bra, it’s ideal for yoga or Pilates. The fabric is buttery soft and super comfortable—pair it with leggings for class or layer it under a tracksuit jacket for a sporty look.

Velvet Puffer Jacket
I’m really into the velvet puffer jacket—the color, the fabric, and the fit are all spot on. The large collar is perfect for pulling up on cold, windy days.

Whether you work from home or spend long hours at the office, sitting in front of a computer most of the day can hurt your posture and create tension that leads to aches and pains. Even as the pandemic eases, many of us still spend a lot of time at desks or screens, which often causes neck and shoulder pain.

There are many ways to ease the discomfort from sitting all day. Here are easy, desk-friendly chair yoga poses that help release tension and stretch the neck, shoulders, back and hips—areas that commonly hold stress when you’re working. Adding a few of these moves throughout your day can help prevent neck, back and shoulder pain. Even 5–10 minutes or a short lunchtime break can make a big difference. The best part is you can do these stretches while staying at your desk in a chair.

Seated Yoga Stretches You Can Do at Your Desk

For more tips on improving your home or office workspace, check out my post on Zulily, where I share posture tips and ideas for setting up a better home workspace.

Below are several simple stretches that target the neck, shoulders and back. Adding just a few of these chair yoga moves will improve circulation, release tension and give your body some much-needed care.

Chair Yoga Stretches You Can Do at Your Desk

Neck Release (loosens tight neck and shoulder muscles)
Sit tall with your feet flat on the floor. Slowly look up, down, left and right. Bring your chin to your chest, then tilt your head to the right, bringing your ear toward your shoulder—don’t lift or scrunch your shoulder. Hold for 5–10 breaths, then switch sides.

Seated Cat/Cow (opens shoulders and chest; flexes the spine)
Sit near the edge of your chair with feet hip-width and hands on your knees or thighs. Inhale, lift your chest, broaden your collarbones and tilt your gaze up. Exhale, round your spine like a scared cat, tuck your chin and relax your neck. Repeat 5–10 times, or hold each position for a few breaths if that feels good.

Seated Forward Fold (releases tension in the neck, back and hips)
Sit on the edge of your chair with feet slightly wider than hip-width. Place hands on your thighs, inhale, then exhale and fold forward from your hips, bringing your chest down toward or between your legs. Let your upper body hang and release your shoulders and neck. Inhale to sit back up with your hands on your thighs.

Shoulder-opening option: Before folding, clasp your hands behind your back or hold a towel between your hands. When folded, lift your arms to deepen the stretch.

Shoulder Stretch
Bring one arm across your chest (for example, right arm across to the left). Pull your elbow gently toward your chest to feel a stretch across the shoulder.

Desk Downward Facing Dog (stretches shoulders, chest, hamstrings and calves)
Stand in front of a stable desk and place your hands on the desk edge. Step back until your body forms an L shape. Let your chest move toward the floor and breathe for several counts. This stretch works your shoulders, chest, hamstrings and calves.

Crescent Moon (side stretch)
Sit on the edge of your chair with feet hip-width. Inhale and raise both arms overhead. Grab your left wrist with your right hand and lean gently to the right. Exhale, return to center, then grab your right wrist with your left hand and lean to the left. Repeat with your breath for 5 cycles.

Chair Pigeon (releases tight hips)
Sit near the front of the chair. Lift your right knee toward your chest, then cross your right ankle over your left thigh just above the knee. Keep your foot flexed. You may feel a deep hip stretch. For a deeper stretch, lengthen your spine and fold forward from the hips with a straight back as far as comfortable.

Seated Twists (stretches lower back and opens shoulders and chest)
Sit near the front of the chair with feet hip-width. Place your left hand on your right knee, inhale to lengthen your spine, and exhale to twist to the right. Turn from your midsection and, if it feels okay, look over your right shoulder. Hold for 5 breaths, return to center, and repeat on the other side.

Reverse Happy Baby (hip opener)
Sit near the front of the chair and fold forward between your legs with your chin tucked to your chest. Slide your arms behind your calves and reach for the outer edges of your feet. Use your arms to gently pull your body into a deeper fold. Hold for a few breaths, then inhale to sit back up slowly.

Eagle Arms (stretches shoulders and upper back)
Sit tall and extend your arms out to the sides at shoulder height. Cross your right arm over your left with elbows bent and wrap your forearms together if you can, bringing your palms together. Keep your shoulders down and lift your elbows slightly away from your chest. Hold for several breaths and repeat on the other side.

Option to intensify: Press the bottom of the upper arm onto a desk or table while in eagle arms to deepen the stretch.

Shoulder Circles (shoulder mobility)
Extend your arms out to shoulder height and circle them a few times forward, then backward to increase blood flow and mobility.

When work gets busy, it’s easy to sit for hours without moving. Taking short stretch breaks helps relieve muscle tension, reduce fatigue and give your body a reset. Aim to stand or move once every hour, even if it’s just to refill your water, check the mail, or do a few of the simple desk stretches above. Your body will thank you.

A few weeks ago we enjoyed an amazing RV camping trip thanks to the teams at General RV (Mt. Clemens) and GoRVing! I spent many summers camping as a kid and wanted my children to have those same happy memories. It had been years since I’d been in an RV, and wow—RVs have changed a lot. I was impressed by how many comforts they offer now. This getaway has definitely inspired me to take more road trips. If RVs haven’t been your first thought for family vacations, there are plenty of great reasons to consider one on your next trip.

We stayed at the KOA campground in Port Huron, about an hour from the Flint area. The campground has everything a family could want, with tons of activities and amenities. It’s just a few minutes from Lake Huron and a cute downtown area. Don’t miss the Lady Huron II for a boat ride and local tour—the history and views of the Blue Water Bridge are lovely.

Why You Should Go RVing on Your Next Family Vacation

Whether you want to relax by the pool, enjoy outdoor activities, or do arts and crafts with kids, there’s something for everyone. Our KOA even had a mini train the kids loved. They played on playgrounds, swam, rode bikes, jumped on the giant pillow, played sports, and made new friends until they were exhausted by bedtime.

Many campgrounds offer different lot options (some include gas grills and gazebos) whether you bring your own RV or rent one. There are also cabins available—some with linens and full kitchens—for a simpler, stress-free family stay. We stayed in a Kodiak Ultimate RV and I was blown away by the interior and features: easy setup, sleek design, stainless steel appliances, bunk beds for the kids and a separate adult sleeping area, lots of storage inside and out, Bluetooth throughout, and more.

We used to mostly rent homes and cabins when traveling, but trying RV travel has changed my mind. RVs have so many benefits for families on road trips.

10 great reasons to go RVing on your next family vacation or road trip:

1. Less unpacking
Packing and unpacking can be the worst part of travel. In an RV you can keep things organized in designated spaces, so you don’t have to dig through suitcases every stop.

2. Plenty of space for favorites and extras
Kids bring a lot of stuff. An RV gives you room for pillows, favorite blankets and toys, bikes, beach gear, electronics—little comforts that make a big difference.

3. Designated spaces for kids and parents
RVs often have separate living and sleeping areas. We had a private bedroom while the kids had bunk beds with a curtain for privacy—everyone had a spot for their things and some personal space.

4. Better food choices
With a functional kitchen and storage, you can pack your favorite snacks and cook meals. It’s cheaper and usually healthier than eating out the whole time.

5. Fewer roadside bathroom breaks and messes
Having a bathroom on board means fewer stops at questionable gas station restrooms. Sticky hands from snacks? No problem—just wash up nearby.

6. Freedom to change travel plans
Hotels can be restrictive with bookings and fees. With an RV you can change your route or plans on the fly and explore new stops as you go.

7. A home away from home
Bring the items that make your house feel like home—and even your pets—so everyone can enjoy the trip together.

8. No car rental
You won’t need a rental car, which saves money and the hassle of fitting car seats into a new vehicle.

9. Money savings
RV trips can be much more affordable. On average, a family of four can save a lot compared to other travel options since transportation, lodging, and food are combined.

10. Different types of campgrounds and experiences
Campgrounds vary in vibe—some are lively with activities, while others are quiet and rustic. You can choose the atmosphere that suits your family.

Ready to make your own camping memories? General RV has 13 Supercenters nationwide for sales, rentals, parts, and service. Learn more at www.GeneralRV.com and www.GoRVing.com.

For more RV travel info, check resources from GoRVing: dealers, rentals, campgrounds, and affordability guides.

Have you been RVing with your family?

This post is sponsored by Stasher. All thoughts and opinions are my own.

I enjoy cooking, but I love any trick that saves time on meal prep. Over the years I’ve developed a weekly routine that makes cooking easier and more enjoyable. One of my favorite kitchen tools are Stasher bags and bowls. Stasher products are reusable, food-grade silicone bags and bowls that come in lots of colors and sizes. They can store, freeze, organize, and even cook food (microwave, dishwasher, freezer, oven, and boil-safe). I’ve tried many uses for them and keep finding new ways to use them. The leak-free Pinch-Loc® seal does a great job keeping food fresh, which makes them perfect for snacks on the go and my kids’ lunches. They’re also easy to clean—just toss them in the dishwasher.

10 Kitchen Uses for Stasher Bags That Save Time, Money, and the Planet

Beyond their many uses, I appreciate that Stashers are a more eco-friendly option than single-use plastic bags. Sadly, 91% of all plastic is never recycled; much of it ends up in oceans and landfills and can take 500 years to break down. One Stasher bag replaces about 260 single-use plastic bags a year, cutting down on waste and reducing cleanup needs for waterways. Over time they also save money by replacing disposable containers and wraps.

Here are some of my favorite ways to use Stashers in the kitchen to save time, money, and reduce waste. These hacks make meal prep faster, help prevent food waste, and cut back on single-use plastics.

10 Ways to Use Stashers in the Kitchen to Save Time, Money and the Planet

1) Smoothie Packs
If fruit is getting overripe, freeze it instead of tossing it. Browning bananas and berries are perfect for smoothie packs or baking. Sandwich-size bags are great for individual smoothie portions—just add your fruits and veggies, freeze, then pour into a blender with liquid when ready.
You can also freeze vegetable scraps (celery tops, onion ends, carrot pieces) to use later for soup stock.

Freezing tips:
– Cut produce into similar-sized pieces and freeze them on a baking sheet. Once frozen, transfer to a Stasher bag.
– If you skip the pre-freeze, put produce directly into the bag; pieces may stick, but the flexible bags can be bent to separate them.
– Store packs flat in the freezer to save space.

2) Easy On-The-Go Meals
Pack your own lunches to save money and eat healthier. The 2-cup bowls are my favorite—they’re the right size for meals, can be heated safely, and stand up for easy transport. I make shrimp quinoa bowls (quinoa, shrimp, vinaigrette, veggies) in bulk—sealed in the fridge they last up to 4 days.
Snack bags are perfect for school breaks, and sandwich bags are a great alternative to disposable plastic. I love cutting down on daily waste and teaching my kids to be more mindful.

3) Store Fresh Fruit & Vegetables
Fruit and veggies last longer when you clean and store them properly. As soon as I buy berries, I rinse, cut, and put them in a stand-up Stasher bag in the fridge. For broccoli and cauliflower, wash and dry well before cutting and store with as much air removed as possible. Seeing everything ready to use makes it more likely to be eaten before it goes bad.

4) Steam Vegetables
Stashers are safe for oven, microwave, and boiling, so they’re great for steaming vegetables. For microwave steaming, add a tablespoon of water, seal the bag about 90% (leave a small gap to vent), and cook until veggies reach your desired tenderness. For more tips, Stasher’s site has helpful info.

5) Bulk Storage
Buying in bulk saves money and reduces packaging. I store bulk items in Stasher bags so my pantry is easy to see. The large 8-cup bowls are great for oats and grains, and the mid stand-up bags work well for nuts because they hold themselves up and have a wider seal.

6) Portion Frozen Meals
I like portioning leftovers into single servings to freeze and grab for quick meals. Soups are perfect for this—thaw a serving and reheat in a pot of boiling water.

7) Freeze and Store Leftover Herbs
Don’t let herbs go bad—freeze them for later use:
– Wash and dry herbs.
– Chop to the size you want.
– Put chopped herbs in ice cube trays (don’t overfill).
– Pour olive oil to cover.
– Freeze, then remove the cubes and store in a Stasher bag for up to 6 months.
– Add cubes to hot dishes; if adding to a cold dish, thaw first.
Tip: Label bags with a chalk or dry-erase marker on the matte side.

8) Farmers Market Purchases
Skip the plastic produce bags at the farmers market—bring a Stasher bag instead.

9) Rehydrate Stale Bread
Revive crusty or stale bread in the oven. Preheat to 375°F. Lightly wet the bread’s surface, place it in a Stasher bag, seal with a small crack for steam to escape, and bake on a pan for 6–8 minutes. Open and enjoy.

10) Make Popcorn
You can easily make microwave popcorn in a Stasher bag. Use a stand-up bag for best results.
What you need:
– 1/2 cup popcorn kernels
– 1/2 tablespoon olive oil
– Salt and seasonings
How to:
– Put kernels and oil into the bag.
– Close but leave a small vent. Microwave on high for 2–3 minutes until popping slows.
– Use oven mitts to remove the hot bag.
– Open carefully, add salt and seasonings, close, and shake to coat.

Outside the kitchen, Stasher bags have many uses and are an easy sustainable swap to cut plastic waste. For more ideas and sustainability tips, check out Stasher’s blog.

Use code MOMMYGONEHEALTHY15 to save 15% at Stasherbag.com.

Spread the love

In today’s fast-paced world, taking time for calm and self-care is important for both body and mind. Breathwork has become a popular, simple way to manage stress, sharpen focus, and feel better overall. Below we’ll explain what breathwork is and share three easy techniques for beginners.

What is breathwork?
Breathwork refers to different methods of consciously controlling your breathing to affect your physical and mental state. People have used breath techniques for thousands of years—from yoga’s pranayama to Zen breathing—because the breath is closely linked to our emotions and health. Learning to work with your breath can bring many benefits, from reduced stress to better clarity and balance.

Breathwork Essentials: Practical Techniques for Beginners

Three beginner-friendly breathwork techniques

1. Diaphragmatic Breathing (Belly Breathing)
This basic technique is great for calming down and can be done anywhere.
– Sit or lie down comfortably.
– Put one hand on your chest and the other on your belly.
– Breathe in slowly through your nose so your belly rises.
– Breathe out through your mouth so your belly falls.
– Continue for a few minutes, slowly lengthening each inhale and exhale.

2. Box Breathing (Four-Square Breathing)
Box breathing gives your breath a steady rhythm and helps calm the mind—useful for stress or anxiety.
– Sit comfortably with a straight back.
– Inhale through your nose for a count of four.
– Hold your breath for four counts.
– Exhale through your mouth for four counts.
– Hold again for four counts.
– Repeat for several rounds, increasing the count if it feels comfortable.

3. Alternate Nostril Breathing (Nadi Shodhana)
This yoga-based practice can help balance the two sides of the brain and bring mental clarity.
– Sit tall and relaxed.
– Close your right nostril with your right thumb and inhale through your left nostril.
– Close your left nostril with your ring finger, release your right nostril, and exhale through the right.
– Inhale through the right nostril.
– Close the right nostril with your thumb, release the left, and exhale through the left.
– Repeat for several cycles, finishing on an exhale through the left if you’d like.

Breathwork is easy to add to your daily routine and can help you feel more relaxed and centered. These three techniques are a good place to start—practice regularly to notice the benefits and deepen your awareness. Breathe slowly and often, and let your breath guide you toward greater calm and balance.

Green smoothies are one of my favorite ways to start the day—full of nutrients and a quick energy boost. They’re an easy way to add more fruits and veggies to your routine. Some people worry that a veggie-filled drink won’t taste good, but the trick is finding the right balance of greens, fruit, and liquid, and using a strong blender that makes everything smooth. I also use green smoothies to sneak extra veggies into my kids’ diets.

This post may contain affiliate links.

12 Nutrient-Rich and Delicious Green Smoothie Recipes

Why green smoothies?
Green smoothies are great for your health. Fruits and vegetables are loaded with vitamins (like C and A) and antioxidants that support the immune system. Unlike cold-pressed juices, smoothies keep the fiber, which helps digestion and keeps you feeling full and energized—without the crash you might get from sugary or highly caffeinated drinks. Many green fruits and vegetables also contain chlorophyll, which can help detoxify, improve skin glow, and give you a natural energy lift.

Tips for making the best green smoothies
– Balanced ratio: Aim for a good mix of greens, fruit, and liquid. A simple guideline is 1 cup greens, 1 cup liquid, and 1 cup fruit for a balanced, slightly sweet smoothie.
– Use healthy liquids: Try nut milks, oat milk, water, or coconut milk.
– Add healthy fats: Nuts, seeds, avocado, or a bit of coconut oil help your body absorb more nutrients.
– Use a quality blender: Not all blenders are the same—choose a powerful, easy-to-clean model. I’m a Vitamix fan and love mine.
– Boost it: Add protein powder, spices like cinnamon or ginger, or superfoods like ashwagandha, maca, or hemp hearts. NOW Foods is my go-to for boosters (use code AMBER for 20% off).
– Blend greens with liquid first to avoid chunks, then add fruit and blend again.
– Skip ice—use frozen fruit so the smoothie isn’t watered down.
– Prep ahead by chopping fruit and veggies, storing them in reusable bags (I like Stasher bags), and freezing. Ready to blend when you are.
– Get creative with greens—there’s more than spinach and kale.

Greens you can use:
Spinach
Romaine
Kale
Beet greens
Bok choy
Broccoli
Chard
Celery
Collard greens
Herbs
Lettuce
Microgreens
Sprouts

If you want some recipe ideas, here are plenty to try.

How to make a green smoothie:
Pack the greens into a measuring cup. Add the greens and liquid to the blender and blend until no chunks remain. Add fruit, nuts, seeds, or other add-ins and blend until smooth. Pour into your favorite cup and enjoy!

12 healthy and delicious green smoothie recipes:

Happy & Healthy Smoothie:
1 cup fresh spinach
1/2 cup frozen pineapple
1/2 cup frozen mango
1/2 banana
1 cup liquid (milk or water)

Green Goddess Smoothie:
1 cup unsweetened almond milk
1 cup frozen pineapple
1 banana, sliced
1/2 cup frozen peas
2 tablespoons pumpkin seeds
1 cup chopped kale

Pina Colada Green Smoothie:
1 cup fresh spinach
1/2 cup coconut milk
1/2 cup water
1 1/2 cups frozen pineapple chunks

Apple Banana Green Smoothie:
1 cup fresh spinach
1 cup milk
1 frozen banana
1 sliced apple
1/4 avocado

Tropical Green Smoothie:
1 cup kale
1/2 cup water
1/2 cup orange juice
1/2 cup frozen pineapple
1/2 cup frozen mango
1 tablespoon chia seeds

Metabolism Booster Green Smoothie:
1 cup raw spinach
1 cup almond milk
1 peeled orange
1/3 cup frozen strawberries

Shamrock Green Smoothie:
1 frozen banana
1/2 cup pineapple (add juice if you want it sweeter)
1/2 cup plain Greek yogurt
2 large handfuls spinach
1 tsp coconut oil (melt before adding)
3/4 cup milk or water

Fat Burner Green Smoothie:
1 cup fresh spinach
1 cup milk
1 cup frozen pineapple chunks
1/2 tsp ginger
1 tablespoon chia seeds

Berry Green Smoothie:
1 cup fresh spinach
1 cup water or milk
1/2 cup strawberries
1/4 cup blueberries
1/4 cup Greek yogurt

Apple Pie Green Smoothie:
1 cup spinach
1 cup milk or water
1 green apple, sliced
1/4 cup blueberries
1/4 tsp cinnamon
1/8 tsp nutmeg
1/2 tsp vanilla extract
1 tablespoon chia seeds

Kale Yeah! Green Smoothie:
1 cup fresh kale
1 cup vanilla almond milk
1/2 cup frozen berry mix
1/2 cup frozen blueberries
1 tablespoon honey

Detox Celery Green Smoothie:
1/2 cup chopped celery stalks
1/2 cup packed fresh spinach
1 green apple
1 frozen banana
1/4 tsp grated ginger
1/2 cup almond milk
1/2–1 tablespoon lemon juice
Handful of ice
Note: Blend the celery very well—it takes longer to break down than other greens.

I hope one of these recipes inspires you to try a green smoothie. They’re full of nutrients, taste great, and are an easy way to add superfoods to your day. Don’t forget a good tumbler to keep your smoothie cold on the go—I love tumblers with a straw and great reviews!

Share: 10 Shares

This post is sponsored by Sivan Social. All comments and opinions are my own.

With the seasons changing, I’m shifting focus from the garden and patio to the inside of the house. We’ve been eager to redecorate for months, and now that we’ll be spending more time indoors, I can’t wait to start refreshing a few spaces. I’m especially excited to update my home office corner, which sits in the family/living room. It needs to be stylish, functional, and organized so it blends smoothly with the rest of the space.

Home Depot's Top Picks for Home Office Decor

My plan includes simple updates like wallpaper, new lighting, a desk, and a few decor and organization pieces. One of my favorite places for home decor is Home Depot. Beyond tools and DIY supplies, HomeDepot.com has a wide selection of furniture, bedding, window treatments, kitchenware, and more — everything you need to decorate your home.

I’m taking advantage of Decor Days at Home Depot to save up to 15% on trending styles (9/15 through 9/29). Use coupon code DECORDAYS15 to save.

Because my office is small, I want to use every inch well. Our living space leans modern with earthy touches: warm wood tones, gold accents, lots of greenery, and light colors like soft browns, whites, and blues. Pieces with drawers and shelving are a must for staying organized and maximizing storage.

Favorite Home Office Picks from Home Depot:

Walnut/White Marble Writing Desk
I love the simple design and the large writing surface. The finish is versatile and the white marble top brightens the area. Available in several finishes.

Fallon White Office Chair
A classic, traditional chair that works with many styles. I like the white-washed legs, tufted cushion back, and adjustable height for comfort. It also has nearly a five-star review. Read more here.

White/Gold Brass 6-Shelf Tall Ladder Bookshelf Wall Mount
This ladder shelf has a small footprint but adds vertical storage and visual height — perfect for saving space. Comes in different colors and finishes. Learn more here.

Willow Green Botanical Paper Pre-Pasted Strippable Wallpaper Roll
A statement wall is one of my main goals. This botanical print adds color and pattern without being overwhelming. It’s easy to install and remove, ideal for homes and apartments, and comes in many color options. See options here.

Mid-Century Planters
Live plants bring life and help clean the air. I’m planning to use these plant stands around my desk. Home Depot also has a great selection of houseplants at fair prices.

Water Hyacinth Decorative Baskets
Perfect for hiding odds and ends while adding texture. Use them on shelves or along the floor for a tidy, attractive look. Find here.

Gold Accent Mirror
I love the bold lines of this mirror. Placed across from a window, a mirror can reflect more light and create the illusion of extra space — ideal above a desk. Details here.

Gold Table Lamp
A tall, slim table lamp that offers good light and a bit of glam. Pairs nicely with a neutral palette. Buy here.

Knickknacks and Shelf Decor
Unique decor for shelves adds dimension and personality. I like gold and white wood boxes for hidden storage, crystal-accented bookends for interest, and a trio of small vases for layering.

If you’re thinking about updating your space, check out Decor Days to save up to 15% on trending decor. Also enter the Savings.com #ShopHomeDepotDecor giveaway for a chance to win a $250 e-gift card to spend at Home Depot.

Do you have any rooms you want to refresh or redecorate?

Spread the love

Newer Posts