Author

momfad_com

This post is sponsored by Pacific Foods® in partnership with SheSpeaks. All opinions are my own. #ad

If you’re always hunting for a family dinner everyone will eat, this one-pot garlic parmesan pasta is it. The creamy garlic-parmesan sauce, made with Pacific Foods® Organic Free Range Chicken Broth, is full of flavor, simple to make, and a true crowd-pleaser.

One-Pot Pasta with Garlic and Parmesan

Why this works for weeknights:
– Ready in under 30 minutes
– Uses quality ingredients
– Loved by the whole family

Pasta is my go-to for busy nights, and this garlic parmesan sauce is a great base that works with many pastas and pairs easily with chicken, shrimp, meatballs, or veggies. I like to make a big batch to enjoy for dinner and to have leftovers later in the week.

One of my favorite things about this recipe is that it cooks in one pot. Fewer dishes make dinner time much easier—no draining, just toss everything in a wide pot or pan, stir now and then, and you’re done.

It’s cozy and comforting and takes less than 30 minutes: about 5 minutes of prep, 20 minutes to cook. I often serve it with grilled chicken strips, sautéed shrimp, or Italian meatballs and a simple side like a salad, broccoli, or green beans.

The sauce depends on three main ingredients: chicken broth, milk, and parmesan cheese. The broth you pick really affects the flavor. I use Pacific Foods® Organic Free Range Chicken Broth—it has just the right blend of organic free-range chicken, sea salt, and seasoning for a rich, full flavor. I keep several cartons in the pantry for soups, rice, risottos, Instant Pot recipes, and pasta. A splash can boost the flavor in many dishes. Pacific Foods® products use high-quality organic ingredients and are fat-free and gluten-free, so you get good nutrition without losing taste.

How to make one-pot garlic parmesan pasta
You’ll need a wide soup pot so the pasta fits. If needed, break the pasta in half.

Ingredients:
– 4 Tbsp unsalted butter, divided
– 8 cloves garlic, minced (I usually double the garlic because I love it, but this recipe uses a moderate amount)
– 4 cups Pacific Foods® Organic Free Range Chicken Broth
– 2 1/2 cups milk
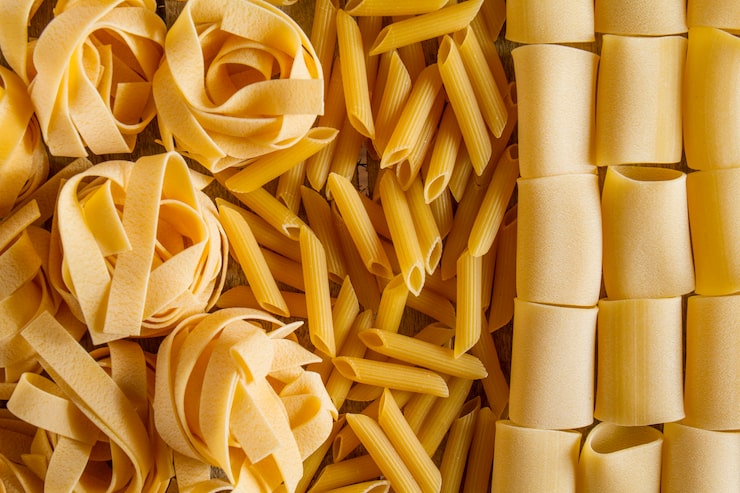
– 16 oz fettuccine pasta (spaghetti works too—watch the cook time and you may need more milk)
– 3/4 cup parmesan cheese (freshly shredded is best, but prepackaged is fine)
– 1/2 Tbsp Italian seasoning
– Salt and pepper, to taste
– Chopped parsley, for garnish

Tips:
– Use a large, wide pot so the pasta is covered by the broth. Break the pasta if it won’t fit.
– Stir often, especially at the start, to prevent sticking.
– Want fewer servings? Halve the recipe for about 4 servings.
– If the sauce gets too thick before the pasta is done, add more milk or chicken broth to loosen it.
– Tongs are helpful to stir and move the pasta so it cooks evenly.
– Reheating will thicken the dish; add a splash of milk and stir while reheating. I also enjoy leftovers cold—almost like a baked casserole.

One-Pot Garlic Parmesan Pasta
Prep time: 5 minutes
Cook time: 18 minutes
Total time: 23 minutes
Servings: 8

Directions:
1. Add 2 tablespoons of butter to a large, wide pan and melt over medium heat.
2. Add the garlic and cook, stirring often, for 1–2 minutes until fragrant.
3. Pour in the Pacific Foods® Organic Free Range Chicken Broth, milk, Italian seasoning, salt, and pepper, then bring to a boil.
4. Reduce heat to a simmer and add the pasta. Stir occasionally and cook until the pasta is fully cooked, about 18 minutes.
5. Turn off the heat when the noodles are done. Stir in the remaining butter and the parmesan cheese until melted and the pasta is coated. If the sauce is too thick, add more milk or chicken broth to thin it.
6. Serve right away and sprinkle with chopped parsley.

Spread the love
383 Shares

Calling all adventurous fourth graders and their families! The Every Kid Outdoors program gives fourth graders free access to hundreds of national parks, wildlife refuges, forests, and more for a full year.

What is Every Kid Outdoors?
Started in 2015 by the U.S. Department of the Interior, Every Kid Outdoors aims to help kids fall in love with nature by offering a free annual pass to all U.S. fourth graders. The pass lets students and their families visit thousands of federal lands and waters without paying entrance fees.

Explore America's National Parks for Free with the Every Kid Outdoors Pass

Why fourth graders?
Around age ten—usually fourth grade—kids are at a great age to form lasting connections with the outdoors. They can understand and enjoy nature while still being strongly influenced by these experiences. The program encourages outdoor activity and teaches responsibility for caring for the environment.

How it works
Who’s eligible: Any U.S. fourth grader, including homeschooled students and free-choice learners.
Getting your pass: Visit the Every Kid Outdoors website, complete a short activity, and print a voucher for your free annual pass.
Using your pass: If a site charges an entrance fee, show the voucher at the ranger station for free entry. The pass is valid from September 1 through August 31.
Who the pass covers: The pass covers the fourth grader, up to three accompanying adults, and all kids under 16 in the group.

Where you can go
Use the pass at over 2,000 federal sites—national parks, forests, wildlife refuges, historic sites, and more. Many locations offer ranger programs, guided tours, and kid-friendly activities.

Make the most of it
– Start local: Visit nearby parks first to build confidence and plan longer trips later.
– Plan a road trip: Search parks by state or region to pick destinations everyone will enjoy—hiking, camping, history, or ranger programs.
– Become a Junior Ranger: Many parks have activity booklets and badges that teach kids about plants, animals, geology, and history.
– Try citizen science: Help with projects like bird counts, water monitoring, or plant surveys to learn and give back to the park.

Tips for safe, fun trips
– Pack essentials: sunscreen, bug spray, sturdy shoes, weather-appropriate clothing, snacks, water, and a basic first-aid kit.
– Leave No Trace: Pack out trash and follow park rules to keep places beautiful for others.
– Document memories: Take photos, write in a journal, or collect small items with permission to remember your trips.

Every Kid Outdoors is a chance to explore, learn, and make memories with your family. Get your pass, pack your bags, and enjoy a year of outdoor adventures—then share the experience with friends and family.

The holiday season is here, and it’s time to find the perfect Christmas tree! I’ve admired King of Christmas for years, so I was excited to finally replace our old tree with a new one from them. This year I chose the 7.5-Foot King Flock Tree with LED Lights, and I’m really happy with it. It’s beautiful, and everyone in our family can’t stop oohing and aahing over it. Here’s my take.

This post is sponsored by King of Christmas. All thoughts and opinions are my own.

King of Christmas 7.5-Foot King Flock Christmas Tree

First impressions
When I unboxed the King Flock Tree, I was immediately impressed. The flocking gives it a snowy look that really brings the holiday spirit into our home. This was our first flocked tree, and I’m not sure I could go back—the white flocking pops against the dark green of our living room walls and feels a bit magical. The branches look very realistic, and with its 7.5-foot height and medium width, it fits perfectly without making the room feel cramped.

Assembly
Putting the tree together was easy. The sections snapped into place, and the branches were alphabetically labeled, so it was simple to know where everything belonged. The tree comes in three sections, and when you set them up they automatically connect the lights through the center pole—no hunting for plugs. With a little shaping of the branches, I had it ready in about 30 minutes. The base is sturdy, which is great with kids around. I also loved not having to string lights myself; having them already attached saved a lot of time. Flocked trees can make a bit of a mess, but the fallen flocking was quick to sweep or vacuum.

LED lights
The built-in LEDs (800 lights) are a big plus. They’re bright, energy-efficient, and give the tree a warm glow. There are several light settings—from twinkle to steady—so you can pick the mood you want. The warm white light pairs nicely with the flocking and adds to the cozy feel. It even includes a foot pedal so you can switch the lights on or change modes easily.

Aesthetics
This tree looks very realistic. The mix of branch tips creates a full, lush look that rivals a real tree. The heavy flocking makes it look like evergreen branches after a fresh snowfall. It’s beautiful on its own, and it also makes a perfect backdrop for ornaments.

Durability
After a few weeks up, the tree is holding up well. The branches feel sturdy, and I haven’t noticed much flocking shedding. The LED lights still shine bright with no flicker—definitely a win.

Care and storage
Taking the tree down after the holidays shouldn’t be too difficult. The branches collapse neatly, so it should fit back into the box or the provided tree storage bag without much trouble.

Final thoughts on the King of Christmas 7.5-Foot King Flock Tree with LED Lights
Overall, we’re obsessed and very impressed with our King of Christmas 7.5-Foot King Flock Tree with LED Lights. It looks great, sets up easily, and the LED lights make it a perfect addition to our holiday decor. If you’re looking for a new tree, I highly recommend this one (and King of Christmas trees in general). It really captures the season and has become the centerpiece of our holiday celebrations.

A few things to consider when buying an artificial Christmas tree
Here are some quick tips to help you find the right tree for your space:

1. Size matters
Measure the spot where you’ll put the tree before you buy. You don’t want something too tall for your ceiling or too wide for the room. The right size keeps the space feeling cozy and festive.

2. Flocking choices
If you like the snowy look, go for a flocked tree. It adds charm but can shed a bit during setup. If you prefer a classic look, choose a green tree with realistic needle tips.

3. Lighting options
Pre-lit trees save time and hassle. LED lights last longer and use less energy. If you like changing your look often, an unlit tree lets you customize the lights each year.

4. Quality counts
A good-quality tree can last many seasons. Look for durable materials and read reviews to avoid a tree that loses shape or color over time.

5. Setup and storage
Think about how easy the tree is to assemble and take down. Hinged branches make setup simpler. Also consider whether it will fit back into its box or a storage bag.

6. Budget-friendly options
Set a budget before you shop. While cheaper trees are tempting, spending a bit more on quality can pay off in the long run.

Choosing the right artificial tree doesn’t have to be stressful. Keep these tips in mind and you’ll find a tree that brings holiday cheer for years to come. Happy decorating! 🎄✨

Spread the love

Being a mom often feels like living in a constant whirlwind. Between work, kids, and housework, finding time for yourself can seem impossible. But taking care of yourself isn’t selfish — it’s necessary. One of the best ways to do that is regular exercise.

I know how hard it is to stick to a routine. There are always excuses: a sick child, piles of laundry, or just being worn out. What helped me was finding a workout plan that fits my life and feels doable.

A Mom's Guide to Maintaining a Regular Exercise Routine

Here are a few tips that kept me consistent:
1. Make it a priority: Put workouts on your calendar like any other important appointment. Find times in your day when it’s easiest to move and protect that time.
2. Find a workout buddy: A partner makes it more fun and keeps you accountable. It’s harder to skip when someone else is counting on you.
3. Make it enjoyable: Pick activities you actually like—dancing, swimming, hiking, whatever makes you smile. You’re more likely to stick with something you enjoy.
4. Start small: Begin with short workouts and slowly increase time and intensity. Don’t do too much at once.
5. Don’t beat yourself up: Setbacks happen. If you miss a workout, don’t let it derail you. Just get back to it.

More simple ideas:
– Create a workout space: Dedicate a corner of your home for exercise, even if it’s small. It helps you focus and makes workouts feel real.
– Add exercise to your day: Take the stairs, walk on your lunch break, go for a family bike ride after dinner, or stretch while watching TV.
– Set realistic goals: Aim for small, achievable milestones instead of drastic changes overnight.
– Reward yourself: Celebrate progress with something you love. New workout clothes or shoes can be a great motivator.

Keep in mind why you’re doing this: regular exercise boosts mood, energy, and overall quality of life. Consistency matters more than perfection — even small amounts of movement add up. Make a promise to put your health first. You deserve it, mama!

Spread the love

Candy Corn Jell-O Fruit Cups

These candy corn Jell-O fruit cups are a sweet, easy snack that’s perfect for fall and Halloween. Keep reading for the full recipe!

Jell-O Fruit Cups with Candy Corn

Fall is my favorite season. I love the cooler weather, the changing leaves, cozying up at home with soup and a thick sweater, and making all my favorite seasonal treats.

I absolutely adore making these Jell-O fruit cups. They’re cute, simple to make, and kids always love them. I’ve made them for after-school snacks, classroom Halloween parties, and play dates—kids always ask for more. The layered colors are festive and fun for fall gatherings.

They’re made with just a few ingredients: lemon Jell-O and orange fruit (fresh or canned), plus whipped topping. You can make them ahead of time to save effort—just wait to add the whipped topping. These are nut-free, so they’re a good option for classroom treats (just double-check for milk allergies).

How to make candy corn Jell-O fruit cups

Ingredients:
– 1 package lemon Jell-O
– 2 cups orange-colored fruit (mandarins, peaches, or similar). If using canned fruit, drain well. Fresh fruit works too.
– Whipped topping

Steps:
1. Pour prepared lemon Jell-O into the bottom third of a clear cup.
2. Chill in the refrigerator until set, about 3–4 hours.
3. Once the Jell-O is firm, add the orange fruit on top.
4. Add whipped topping right before serving.

Tips for classes or large groups:
– Use clear plastic cups for easy serving and cleanup.
– You can prep the Jell-O in the cups, or simply spoon a few scoops of set lemon Jell-O into cups and top with fruit. It may not be as neat, but it still looks cute.
– Don’t add the whipped topping until just before serving.

Recipe at a glance:
– Prep time: 10 minutes
– Total time: 3 hours 10 minutes
– Servings: 4

Ingredients (quick):
– 1 package Lemon Jell-O
– 2 cups canned or fresh orange fruit (mandarins, peaches)
– Whipped topping

Instructions (quick):
1. Add liquid Jell-O to the bottom third of a clear cup. Chill 3–4 hours.
2. Add fruit.
3. Top with whipped topping right before serving.

Did you notice the “Thank the creator” button at the top of my blog? I’m excited to share that I’m part of Google’s paid early testers for their Thank with Google pilot. It lets you buy a virtual sticker to show appreciation for content on my site. There are paid stickers and free stickers you can send, and you can add a short message with a paid sticker. The money from paid stickers helps support the work that goes into the blog. You’ll find the Thank with Google feature in a few places on the site — and as always, THANK YOU for your support!

Spread the love

This post is sponsored by NOW Foods. All thoughts and opinions are my own.

Fresh butternut squash is tossed with maple syrup, cinnamon, and rosemary, then roasted until tender and caramelized. The mix of sweet and savory tastes makes it great for a special dinner but simple enough for a weekday side. It’s a lovely way to enjoy winter produce.

Maple-Cinnamon Roasted Butternut Squash

I like planning meals around what’s in season. Fruits and vegetables have peak times when they’re freshest, often cheaper, and more flavorful. As winter sets in, I stock up on a few favorite cold-weather items. I crave warm, comforting dishes like stews and roasted vegetables—root veggies and winter squashes (butternut and acorn are favorites) really shine when roasted. One of our go-to sides this time of year is roasted maple cinnamon butternut squash.

Butternut squash is usually harvested in late fall, but it stores well for months, so it’s a handy, long-lasting fresh option to keep on hand.

This roasted maple cinnamon butternut squash is perfect for chilly nights. Bright squash cubes are coated in maple syrup, cinnamon, and rosemary, then roasted to golden, tender perfection. The result feels special enough for a dinner party and easy enough for a weeknight. I love recipes that use ingredients I already have to make something tasty with little effort.

The maple and cinnamon deepen the squash’s natural flavor and give the dish a cozy feel. Fresh rosemary is best, but dried works too—I used dried this time because fresh herbs were hard to find at the store.

Ingredients:
– 1 large butternut squash, peeled and cut into 1-inch cubes
– 2 1/2 tbsp NOW olive oil (or extra virgin olive oil)
– 2 1/2 tbsp NOW Foods maple syrup
– 1/2 tbsp dried rosemary (or 1 tbsp chopped fresh rosemary)
– 1 tsp cinnamon
– 1 tsp kosher salt
– 1/2 tbsp brown sugar (optional)
– Fresh black pepper, to taste

Tips:
– With so few ingredients, pick ones with good flavor. I use NOW Foods Organic Maple Syrup (grade A) for its delicate taste and NOW extra virgin olive oil for its balanced flavor and high smoke point. If you can find fresh rosemary, use it.
– Use code AMBER to save 20% at nowfoods.com.

How to cut butternut squash:
– Wash and dry the squash.
– Trim about 1/4 inch off the top and bottom with a very sharp knife.
– Peel the skin with a vegetable peeler. The skin is edible but not very pleasant.
– Slice lengthwise down the center.
– Scoop out the seeds and pulp with a spoon.
– Cut into relatively even 1-inch cubes.

Steps:
1. Preheat the oven to 400°F. Lightly oil a large baking pan or spray with nonstick spray.
2. Peel and cube the squash, then place the pieces in a large bowl.
3. In a small bowl, whisk together olive oil, maple syrup, cinnamon, and dried rosemary (if using dried).
4. Pour the mixture over the squash and toss to coat.
5. Spread the squash in a single layer on the prepared baking pan. Sprinkle with salt, pepper, and brown sugar if using (brown sugar adds a deeper sweetness but is optional).
6. Roast 30–40 minutes, flipping once halfway through, until the squash is browned and tender.

Note: If you’re using fresh rosemary, don’t add it until after roasting—sprinkle it on once the squash comes out of the oven. Serve warm.

How to enjoy:
This roasted maple cinnamon butternut squash works beautifully with roasted chicken or pork tenderloin. I also love tossing it into a spinach salad with grilled chicken, walnuts, goat cheese, and cranberries, dressed with a Dijon vinaigrette. You can swap it into recipes that call for roasted sweet potatoes, like warm kale salads.

Roasted Maple Cinnamon Butternut Squash
Prep time: 10 minutes
Cook time: 30–40 minutes
Total time: 40–50 minutes
Servings: about 6

Ingredients:
– 1 large butternut squash, washed, peeled, and cut into 1-inch cubes
– 2 1/2 tbsp extra virgin olive oil
– 2 1/2 tbsp maple syrup
– 1/2 tbsp dried rosemary (or 1 tbsp finely chopped fresh rosemary)
– 1 tsp cinnamon
– 1 tsp kosher salt
– 1/2 tbsp brown sugar (optional)
– Black pepper to taste

Instructions:
1. Preheat oven to 400°F and oil a large baking pan.
2. Place peeled, cubed squash in a large bowl.
3. Mix olive oil, maple syrup, cinnamon, and dried rosemary in a small bowl (skip rosemary here if using fresh; see note).
4. Pour the mixture over the squash and toss to coat.
5. Spread the squash evenly on the baking pan. Sprinkle with salt, pepper, and brown sugar if using.
6. Bake 30–40 minutes, flipping once, until browned and tender. Serve warm.

Notes:
– If using fresh rosemary, add it after roasting.
– Don’t overcrowd the pan—give the squash room so it browns and caramelizes well.

Other simple sides to try:
– Roasted Tomato and Garlic Pasta
– Cilantro Lime Coleslaw
– Cranberry and Walnut Wild Rice Pilaf
– Baked Green Bean Fries

Use code AMBER to save 20% at nowfoods.com.

This post is sponsored by Sivan Social. All comments and opinions are my own.

With the seasons changing, I’m shifting my focus from the garden and patio to the inside of the house. We’ve wanted to redecorate for months, and now that we’ll be spending more time indoors I’m excited to start refreshing a few areas. My top priority is the home office corner—it’s tucked into our family and living room, so it needs to be stylish, functional, and tidy so it blends well with the rest of the space.

Best Home Office Decor Finds at Home Depot

I’m planning simple updates like wallpaper, new lighting, a desk, and a few decor and organization pieces (frames, storage, etc.). One of my favorite places to shop for items like these is Home Depot. Beyond tools and DIY supplies, HomeDepot.com has a great selection of furniture, bedding, window treatments, kitchenware, and more—really everything you need for decorating your home.

I’m taking advantage of Decor Days at Home Depot to save up to 15% on trending styles from 9/15 through 9/29. Use coupon code DECORDAYS15 to save.

My office is small, so making the most of every inch is key. Our living area has a modern-but-earthy vibe with warm wood tones, gold accents, lots of greenery, and light colors (soft browns, whites, and blues). Pieces with drawers and shelves are essential to stay organized and keep storage handy.

Favorite Home Office Picks from Home Depot:
– Walnut/White Marble Writing Desk: Simple design with a large workspace. The marble top brightens the area and the finish works in many rooms.
– Fallon White Office Chair: Classic and stylish—whitewashed legs, tufted back cushion, and adjustable height for comfort. Highly rated.
– White/Gold Brass 6-Shelf Tall Ladder Bookshelf (Wall Mount): Slim footprint and great for adding vertical storage without taking much floor space.
– Willow Green Botanical Pre-Pasted Strippable Wallpaper: Perfect for a statement wall—adds color and pattern, and it’s easy to install and remove, ideal for homes or apartments.
– Mid-Century Planters: Real plants bring life to a room and help freshen the air. I like these stands around my desk. Home Depot also has a good plant selection at competitive prices.
– Water Hyacinth Decorative Baskets: Great for hiding odds and ends while adding natural texture on shelves or the floor.
– Gold Accent Mirror: A bold mirror can brighten a room—place it across from a window to reflect light. This would work well above my desk.
– Gold Table Lamp: Tall and slim, this lamp gives good light and a touch of glam—perfect for a neutral palette.
– Shelf Knickknacks and Decor: Small decorative pieces bring interest to bookcases. I like gold-and-white storage boxes, crystal-detail bookends, and a trio of small vases for depth.

If you’re thinking about updating a space, check out Decor Days to save up to 15% on trending decor. Also, enter the Savings.com #ShopHomeDepotDecor giveaway for a chance to win a $250 e-gift card to spend at Home Depot.

Do you have any areas in your home you want to refresh or redecorate?

Spread the love

Sleep sprays are a lovely addition to your bedtime routine. I’ve been enjoying these six sleep spray recipes — they help set the mood for a restful night. Made from simple household ingredients and calming essential oils, they’re easy to mix up. Keep reading for my favorite pillow and sleep spray recipes!

This post is sponsored by NOW Foods. All thoughts and opinions are my own.

6 Pillow & Sleep Spray Recipes for Better Sleep

One thing that really annoys me is lying awake, unable to fall asleep. You toss and turn, watch the minutes tick by, and get more frustrated as the night goes on. It happens to all of us sometimes — whether we’re stressed, overtired, or just too wired, sleep can slip away.

Over the past few months I’ve made sleep a priority, and I’ve noticed a big improvement when I stick to a routine. One of my favorite quick ways to relax and fall asleep is aromatherapy.

Aromatherapy isn’t a magic cure for sleep problems, but it can be a helpful signal to your body that it’s time to wind down. Some essential oils are especially calming and soothing.

Essential oils for sleep:
– Lavender
– Ylang ylang
– Bergamot
– Chamomile
– Cedarwood
– Sandalwood
– Vetiver
– Frankincense

I keep these oils on hand to make diffuser blends and room and pillow sprays. NOW Foods oils are my go-to — they’re high quality, tested in-house, and a great value. Because NOW buys in large quantities and sells directly, they can offer lower prices without skimping on quality. A big win for essential oil fans!

You can use code: AMBER for 20% off at nowfoods.com — that’s where I buy all my oils.

These room and pillow sprays are perfect right before bed. I like that they’re made with natural ingredients, are simple to make, and cost very little. Many store-bought sprays include preservatives and less-than-ideal ingredients, so I sleep better knowing these are made with cleaner, safer components.

A couple spritzes at bedtime can be a gentle cue to your body that it’s time to sleep. Building a bedtime routine is a great habit and can mean less time lying awake and more time getting quality rest.

6 Pillow and Sleep Spray Recipes
Base for each recipe: 1 ounce witch hazel or vodka + 1 ounce distilled water. Add the witch hazel or vodka to a spritzer bottle, then add the essential oils. Shake well before each use.

Dreamland
– 10 drops lavender
– 5 drops orange
– 5 drops chamomile

Sweet Dreams
– 10 drops lavender
– 10 drops chamomile

Sleepy Time
– 12 drops lavender
– 4 drops ylang ylang
– 8 drops bergamot

Lullaby
– 10 drops lavender
– 10 drops cedarwood

Ocean Waves
– 10 drops rosemary
– 10 drops lavender
– 3 drops lemongrass

Meditation
– 5 drops sandalwood
– 4 drops lavender
– 3 drops frankincense
– 3 drops geranium

To use: Shake well and spritz over your bedding or sleeping area.

Don’t forget, use code: AMBER for 20% off at nowfoods.com. In addition to essential oils and diffusers, NOW Foods has a wide selection of natural foods, supplements, pet products, sports nutrition, and beauty items.

Caution: Essential oils are highly concentrated and can irritate the skin. Use carefully and dilute as directed — do not exceed the recipe’s recommended amounts. For adult use only. Keep out of reach of children. Not for internal use. Avoid contact with eyes.

Thanks to BabbleBoxx for sponsoring this post.

I love the shift from summer to fall — it’s the perfect time to refresh my health and beauty routine and try new products for the cooler months. As the seasons change, I check in on my wellness and skincare to see what’s working, what needs to change, and where I could use a little extra care.

Fall Favorites: Health & Beauty

Here are some of my newest fall favorites that add extra nourishment and a wellness boost. As the weather cools, my skin and nails need different care, and these products help fill those gaps.

Biosil Liquid Capsules
Every fall I notice my hair, skin, and nails get drier and more brittle. To give them extra attention, I started taking Biosil Liquid capsules a few weeks ago — one in the morning and one at night — to help protect collagen. Biosil doesn’t contain collagen itself, so it’s vegan-friendly. Instead, it supports your body’s own production of collagen, elastin, and keratin — all key for healthy skin, hair, and nails. Learn more about Biosil here!

Core Foods Pumpkin Spice Bars
One of the best things about fall is pumpkin spice, and CORE’s new limited-edition pumpkin spice bars hit the spot. They blend warm cinnamon and spices with real pumpkin for a delicious fall flavor. I prefer one of these over a PSL any day. These bars use fresh ingredients like oats, dates, and cashews, and include probiotics, prebiotics, vitamins, and minerals — a nutrient-dense snack I love to bring on fall outings. The plant-based CORE Foods pumpkin spice bar is a family favorite I’ll be stocking up on. Use code FALLBOX25 on corefoods.com for 25% off!

Tree Hut Pumpkin Spice and Velvet Coffee Shea Sugar Scrub
I’ve been a longtime fan of Tree Hut sugar scrubs, so I was excited to try their new fall scents. Their scrubs gently exfoliate away dull, dry skin, leaving you refreshed and glowing. Made with ingredients like sugar, shea butter, and natural oils, they keep skin hydrated, smooth, and smelling amazing. With my skin getting drier in the fall, I love using these to keep things healthy and radiant. The Pumpkin Spice and Velvet Coffee scrubs are vegan and free of gluten, parabens, and sulfates.

A bit about each scent:
– Pumpkin Spice Latte: Made with shea butter, pumpkin enzymes (rich in vitamins A and E to refine texture), and nutmeg kernel oil (a natural anti-inflammatory). It has warm notes of pumpkin and nutmeg, plus orange zest, cinnamon, and vanilla — my husband loves this one.
– Velvet Coffee: Made with shea butter, coffee arabica oil, and caffeine. Great for mornings or when you need a pick-me-up — caffeine can help firm and tighten skin, and coffee seed oil helps restore dull skin and lock in moisture. It smells like coffee, sweet maple syrup, and vanilla — rich and decadent.

MedPeel Dark Spot Corrector Brightening Serum
Whether it’s getting closer to 40 or more sun exposure this summer, my skin needed some serious TLC. I’ve noticed more dark spots and hyperpigmentation, partly from hives I had. I started using MedPeel Dark Spot Corrector and already see a difference. The serum uses a skin-brightening complex that can show visible results in 14 days to reduce dark spots, age spots, and discoloration while brightening the complexion. It also contains sodium hyaluronate for hydration, helping skin look luminous and reducing the appearance of fine lines. My skin is sensitive, so I appreciate that this formula is gentle but still effective at fading dark spots and evening out my skin tone. Use code BABBLE20 for 20% off from 10/1/22 to 12/31/22. Click here to learn more!

Do you switch up your products with the seasons? Share the love.

This post is sponsored by BabbleBoxx.

It’s that time of year when many of us think about goals and intentions for the months ahead. Whether you want to eat better, exercise more, drink more water, travel more, or just be more mindful about your health, these products could add a little extra spark to your wellness routine.

Wellness Essentials for a New Year's Reset

Erin’s Faces
Our family has been switching to more natural beauty and health products. I try to avoid petroleum-based items, so Erin’s Faces was a great find. Their Tamanu Balm Barrier Salve is a solid alternative to petroleum jelly, made with three simple ingredients: organic tamanu oil (known for wound healing), organic safflower seed oil (rich in antioxidants), and beeswax (a moisturizing barrier). It’s versatile—use it for minor scratches, bug bites, eczema, burns, diaper care, or extra-dry skin. My dry hands and cuticles have been loving it!
Use code TAMANUBALM for 10% off! Learn more here.

HUM Nutrition
My digestion could use a boost, so I’ve started trying some new supplements. HUM Nutrition Flatter Me contains a blend of 18 full-spectrum enzymes to help break down food and reduce bloating. I take it twice a day before my two main meals so the enzymes can work on protein, carbs, fiber, lactose, and fats. It also has fennel seed to soothe digestion and help with nutrient absorption. I’m just starting, but the reviews are great and I’m hopeful it’ll be the little help I needed.
Use code BABBLE30 for 30% off with a $29 minimum from January 2, 2023–February 22, 2023 at humnutrition.com.

Ultima Replenisher
Staying hydrated matters for overall health, and I love Ultima Replenisher. It tastes great and helps me drink more water through the day. Ultima is a daily performance drink with key minerals and electrolytes—magnesium, calcium, and potassium—to hydrate better than water alone. It also has vitamin C and zinc for immune support. I’ve increased my workouts lately, so these have been really helpful. They’re sugar-free, carb-free, and zero calories. With six tasty flavors (coconut piña colada is a favorite), they’re a great sugar-free hydration choice. As someone who gets muscle cramps, I appreciate the boost from six electrolytes and trace minerals.
Use code BABBLE20 for 20% off (expires 1/31/2023) at ultimareplenisher.com.

BioSil
My hair, skin, and nails get brittle and dry, so I added BioSil Liquid capsules to my routine a few months ago. BioSil helps protect and stimulate your body’s own collagen, elastin, and keratin—all important for strong, healthy hair, skin, and nails. Its ch-OSA® ingredient is the only clinically proven supplement of its kind, backed by over 25 years and $20 million in research. BioSil doesn’t contain collagen, so it’s vegan-friendly; instead, it boosts your body’s natural collagen-making pathways. I like the vegan liquid capsules because they’re small and easy to swallow.
Use code BabbleBoxxBiosil2023 for 25% off a 1-month supply (one-time purchases only, not subscriptions). Learn more about BioSil here!

PlaneAire
With travel plans picking up, avoiding sickness is a top priority. PlaneAire is now a travel essential I keep in my carry-on. The Travel Essentials kit includes Clean Surface & Air Mist, six individually wrapped Clean Surface Wipes, and a PlaneAire® Hands hand sanitizer. I use the mist and wipes on the plane and in hotel rooms to freshen and sanitize surfaces. The mist smells fresh and helps deodorize. The wipes use a blend of essential oils, inner leaf aloe vera, and plant-derived ingredients to clean frequently touched surfaces like trays and armrests. A few squirts of the sandalwood hand sanitizer helps clean any lingering germs while also nourishing my hands. It’s a perfect grab-and-go kit for staying clean while traveling.
To save 10% on Travel Essentials by PlaneAire, use code mommy through 2/15/23 or click the link here (discount will automatically apply).

Spread the love
3 Shares